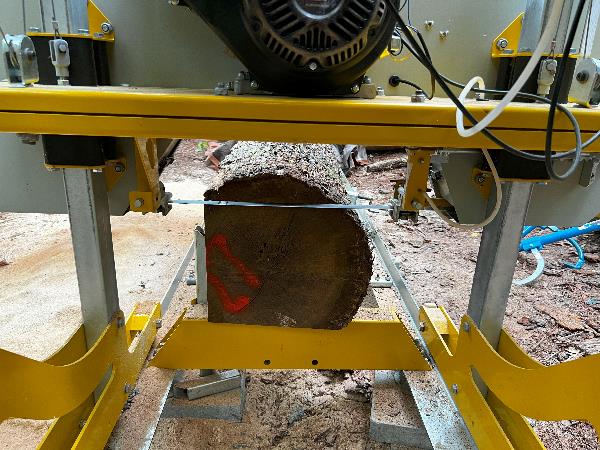
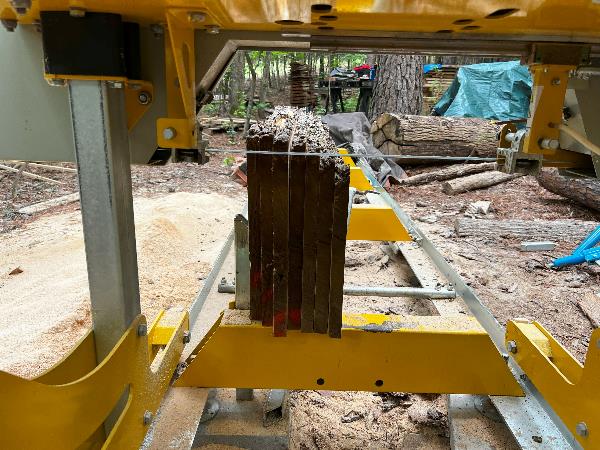
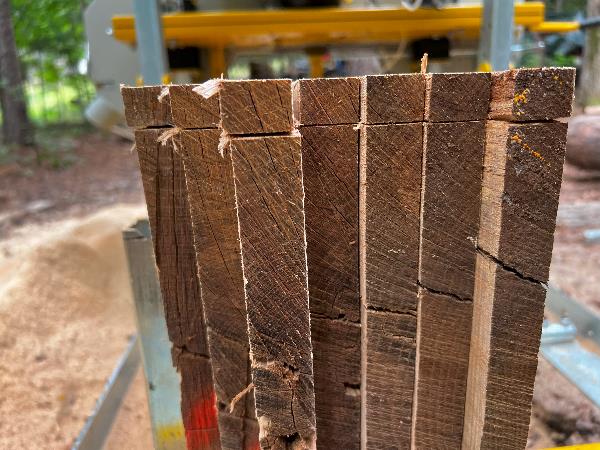
Over the years, portable sawmills have become more affordable and are now commonly used in many rural areas. While cutting lumber out of trees that may have come from your property is satisfying, proper drying of that lumber is necessary to maximize its use. Kiln drying and air drying are two common ways of drying lumber, and both require that boards be arranged with adequate airflow space between the different layers. To do that, thin sticks of wood, or “stickers”, are placed at specific intervals between the layers of lumber. Forest landowners who own a sawmill or are interested in investing in a sawmill for the future, as well as new and beginning portable sawmill owners, will benefit from understanding the process of cutting stickers from a single log using a portable sawmill.
An Introduction to Drying Lumber
Drying lumber is a critical step in lumber production and a way for forest landowners to add value to the timber if they process their trees into lumber. Freshly cut lumber contains a high moisture content (MC) that can vary from 30% to over 100%. The MC may be over 100% as it is measured as the ratio of the weight of water (moisture) in the wood to the dry weight (without any water) of the wood. With an MC over 100%, the weight of the water in the wood would be higher than the weight of the wood when it is completely dried. The lumber eventually dries to an MC in equilibrium with the surrounding air, called equilibrium moisture content (EMC).1 EMC is variable and dependent on relative humidity and temperature. In South Carolina, the EMC varies from 11.6% to 14.5%.2
What are the main reasons for drying lumber? Dried lumber weighs less than green lumber (lumber that has not been dried and has a high MC) and consequently lowers the cost of transportation. Properly dried lumber is less prone to grow mold, stain, or decay, improving its workability (fastening, machining, gluing, finishing, impregnation with preservatives, fire retardants, and coating). Dried lumber is dimensionally stable, will not significantly shrink while in service, and increases in strength and thermal insulation properties.3,4 Lumber will shrink during the drying process as water is removed from the cells and cell walls in the wood.
Using Stickers to Facilitate Drying Lumber
When drying a stack of lumber, the air moves through the stack and removes surface moisture from the lumber. Figure 1 illustrates a stacking scheme where stickers (thin strips of wood) are placed perpendicular to the lumber, creating gaps to facilitate the airflow through the stack. Stickers are crucial for air and kiln drying processes since they guarantee airflow and control the rate of drying (figure 2). Generally, a wider spacing of stickers promotes faster drying, while a closer spacing slows the drying process. Sticker spacing varies based on wood species and the thickness of the lumber. For example, slower drying rates benefit some oak species that need to dry slowly to prevent defects such as cracking and splitting, while a faster drying rate can be used for southern yellow pine and thicker lumber.3,5 Stickers to facilitate drying hardwoods should be spaced 12 to 24 inches apart for 4/4 stock (1-inch thick) and less than 48 inches apart for lumber 8/4 (2-inch thick) or thicker.6 Similar distances are used for softwoods. The exact spacing depends on the drying method that is used (kiln or air drying), and for kiln-drying, the type of kiln used (vacuum, dehumidification, etc.). Commercial sawmills typically develop their own sticker spacing and drying schedule based on local knowledge, species, and company needs. For portable sawmill users, a sticker spacing of 16 to 24 inches is usually adequate to air dry the lumber or place it in a kiln.
Regardless of the sticker spacing, air drying typically takes longer than kiln drying. With air drying, many factors play into this (e.g., time of year, outside temperature, airflow, location, etc.), and a general rule often mentioned by experienced sawyers is that it takes about one year for every inch of board thickness to dry to EMC. Commercial kilns, on the other hand, provide climate control within the drying chamber (e.g., heat, humidity) and can often dry a batch of lumber in two to eight weeks, depending on the species (hardwood typically takes longer), board thickness, and desired MC. Solar kilns are often used by portable sawmill owners to dry lumber by utilizing the power of the sun to dry lumber.7 Several factors such as kiln size, time of year, sun exposure, species, and board thickness can influence the drying time, with a typical range of six weeks to several months to dry lumber.
Hardwood stickers are preferred when stacking lumber because they generally present higher strength and dimensional stability, are more durable, and are less prone to breakage than softwood stickers.8 For example, hardwood species used to make stickers do not bend or warp as easily as softwood species, which helps ensure the layers of lumber stay flat and have the least risk of staining the lumber, known as “sticker shadow.” Softwood stickers are also prone to secreting pitch or sap into the lumber. Common hardwood species in the southern United States used to make stickers are oak, yellow poplar, beech, and hickory. However, softwood stickers may be a viable option for the landowner who occasionally stacks lumber and primarily uses the dried lumber for their personal use. No matter what species are used, stickers must be dry, free of fungi, and should be as uniform in thickness as possible (typically ¾ to 1 inch) to achieve high-quality dried lumber.
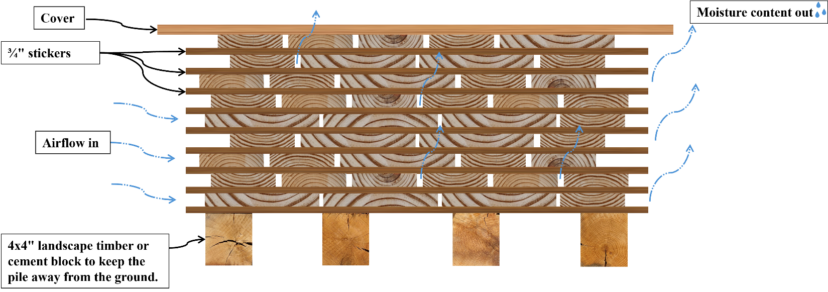
Figure 1. Stickers are positioned to allow airflow through the stack. A cover may be placed on top of the stack to prevent rain and foreign materials from entering the stack. The air moving through the different layers of the stack will remove the surface moisture and allow for the continuous drying of the lumber over time. Image credit: Dr. Brunela Rodrigues, Clemson University.
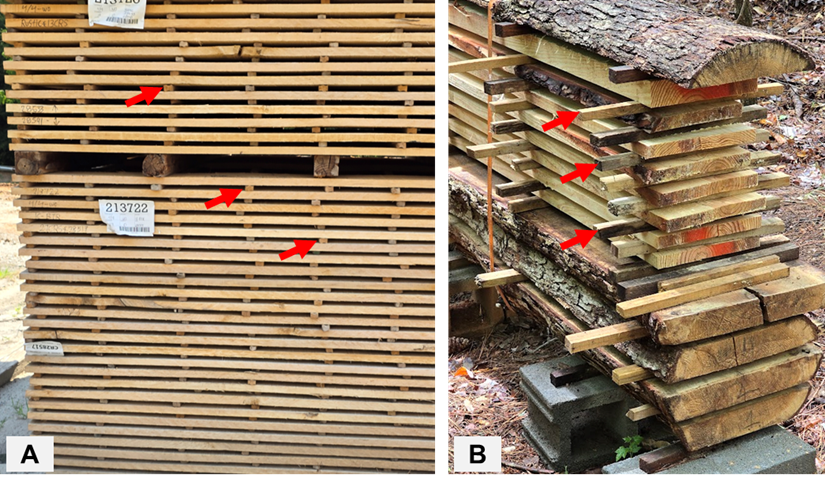
Figure 2. Kiln drying lumber often results in large stacks with layers that are multiple boards deep (A). Air drying of lumber may be done in stacks that are only as wide as one board and are smaller in size (B). However, both options utilize stickers to allow for airflow between the boards. Image credit: Dr. Brunela Rodrigues, Clemson University.
Cutting Stickers With A Portable Sawmill
Using a portable sawmill to cut stickers for lumber drying is one option for acquiring stickers. While multiple companies sell stickers of various sizes and designs, cutting your own is a low-cost way of creating stickers of the correct dimensions for your specific project. The most efficient way of cutting stickers is by dedicating one hardwood log (e.g., oak, hickory, yellow poplar, etc.) to the process. Stickers are typically 3 to 4 feet long with a height of ¾ inch and a width of 1 inch. However, stickers can be any length, height, and width.
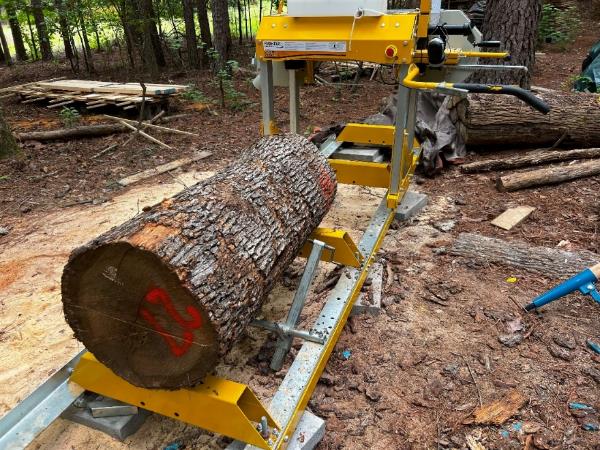
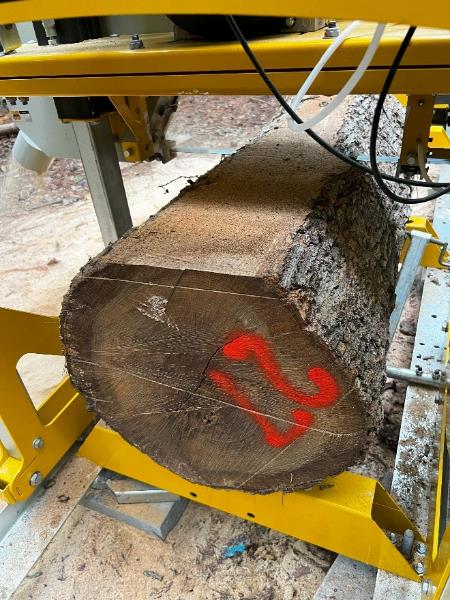
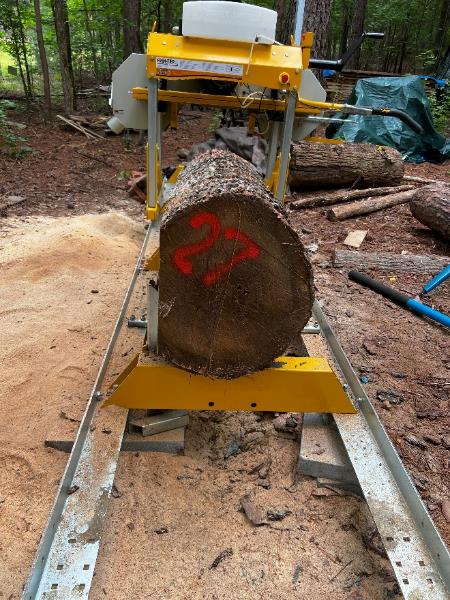
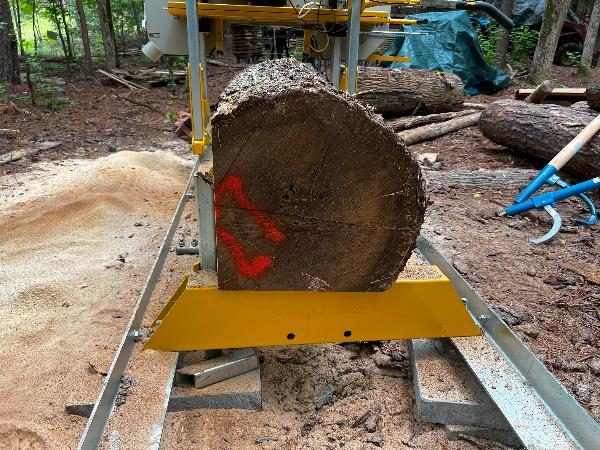
To demonstrate the process, in this article, a white oak log 46 inches long with a small-end diameter of 17.5 inches was used. Logs of other diameters can be used as long as they fall within the size parameters of the sawmill used.
Step 1: Place the log onto the sawmill bed and secure it (figure 3).
Step 2: Cut off the top part of the log, often called a slab or flitch, to create a flat surface (figure 4). The exact height of the cut-off is not that important if you have a reasonably wide, flat surface created. Sometimes, the first cut does not result in the desired width of the flat surface. In that case, adjust the bandsaw head to cut off a 1-inch-thick board, also known as a 4/4 board (figure 4). Save that board next to the sawmill; it will be used later to cut stickers. Repeat cutting 4/4 boards until a flat surface area with a width of roughly 2/3 of the log diameter is achieved.
Step 3: Rotate the log 90 degrees with the flat surface area against the log rests (height-adjustable metal posts) on the back of the sawmill (figure 5). Check that the log rest’s height is adjusted to avoid cutting into them with the next few cuts. Now follow the same procedure as before: cut off the top slab and 4/4 boards until the flat surface on top is about ¾ of the remaining log diameter (figure 6). Save the 4/4 boards beside the sawmill for later use.
Step 4: Rotate the log another 90 degrees, with one flat surface against the sawmill bed and one flat surface against the log rests (figure 7). Now form a three-sided cant with one rounded/natural side. A cant is the square or rectangular piece of wood left after cutting off the rounded slabs on the four sides of a log. Adjust the saw head to cut off the top slab to form a square edge with the flat surface resting against the log rest (figure 8).
Step 5: Cut the remaining 3-sided cant into several 4/4 boards (figure 9). Start at the top and cut one 4/4 board after another. Be sure to adjust the height of the log rests and secure the log as needed to allow the sawblade to cut through the cant. Pile all the boards beside the sawmill for later use (figure 10).
Step 6: Raise the log rests slightly and tie down a few of the 4/4 boards with the bark facing up. It is ok if the boards have different heights. Set the saw head to make the first cut just below the bark of the 3rd or 4th shortest board (figure 11). Then, continue setting the saw head to cut off ¾ inch boards/stickers. Because of the differences in board heights, the first one or two cuts will result in some stickers that include a lot of bark and may not be usable (figure 12), but after that, there will be clean stickers with every cut (figure 13). Repeat this process for all other 4/4 boards that were saved besides the sawmill.
For boards with bark on both sides, rotate them after all the bark has been cut from one side during the sticker-cutting process. That way, the bark from the opposite side can be cut off, and clean stickers from the rest of the board can be made. This will require the boards to be untied, rotated, and then tied back on. Once the pile of boards has been cut to the height of the log rests, it is also time to lower the log rests and secure the boards again.
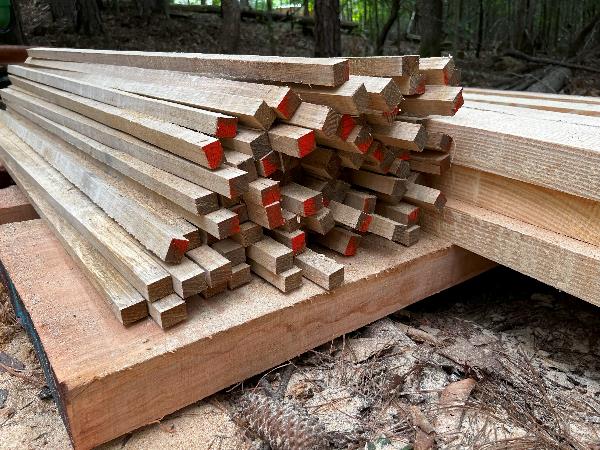
Figure 14. Cutting stickers from one log will result in dozens of stickers that can be used for lumber drying. Image Credit: Dr. Bart Swecker, Clemson University.
For this demonstration, a stationary Frontier OS23 sawmill with an all-purpose saw blade with a 10-degree hook angle was used to cut the stickers. The sawmill utilizes a Briggs and Stratton engine with a 306cc displacement. Within 71 minutes of processing time, more than 100 stickers were made from the oak log used as an example for this article (figure 14).
Summary
Using stickers for spacing layers of lumber is essential to allow for the proper drying of lumber. The space between the layers allows for airflow that will remove moisture from the lumber and slowly dry it over time. Drying lumber is important as freshly cut lumber has a high moisture content and is dimensionally unstable, as lumber will shrink during the drying process. While stickers can be purchased commercially, this article demonstrated how to cut stickers from one log using a small stationary sawmill. The process is relatively simple, but it is important to adjust the height of the log rests to avoid accidentally cutting into them. This process works for different-sized logs. For most hobby sawyers, this process is adequate. Additional steps to ensure equal thickness of all stickers may be needed if large quantities of lumber are cut or cut for a commercial market. Due to the nature of a sawmill, not every sticker will be the exact same height, and a commercially available sticker may be the better option for some sawyers.
Acknowledgment
The work presented in this article was made possible through a 2024 Extension Innovation Grant Award provided by the Clemson Cooperative Extension Service.
References Cited
- Langrish T, Walker J. 2006. Drying of timber. In: Walker JCF, editor. Primary wood processing: principles and practice. Dordrecht (Netherlands): Springer; p. 251-95.
- Simpson WT. 1998. Equilibrium moisture content of wood in outdoor locations in the United States and worldwide. Res. Note FPL-RN-0268. Madison (WI): U.S. Department of Agriculture, Forest Service, Forest Products Laboratory; 11 p.
- Denig J, Wengert EM, Simpson WT. 2000. Drying hardwood lumber. Gen. Tech. Rep. FPL-GTR-118. Madison (WI): U.S. Department of Agriculture, Forest Service, Forest Products Laboratory; 138 p.
- Bergman R. 2021. Drying and control of moisture content and dimensional changes. In: Wood handbook—wood as an engineering material. Gen. Tech. Rep. FPL-GTR-282. Madison (WI): U.S. Department of Agriculture, Forest Service, Forest Products Laboratory; p. 21.
- Shmulsky R, Jones PD. 2019. Wood and water. In: Forest products and wood science: an introduction. 7th ed. Hoboken (NJ): Wiley Blackwell.
- Koch P. 1985. Drying. In: Utilization of hardwoods growing on southern pine sites – volume 2. Agric. Handb. SFES-AH-605. Asheville (NC): USDA-Forest Service; p. 2316-42.
- Bond B. 2020. Design and operation of a solar-heated dry kiln. Publ. 420-030 (ANR-121P). Blacksburg (VA): Virginia Cooperative Extension; 10 p. Available from: https://www.pubs.ext.vt.edu/420/420-030/420-030.html
- Forest Products Laboratory. 2021. Wood handbook—wood as an engineering material. Gen. Tech. Rep. FPL-GTR-282. Madison (WI): U.S. Department of Agriculture, Forest Service, Forest Products Laboratory; 543 p.
Additional Resources
Hiesl P, Steele J. 2022. How to stay safe around chainsaws. Clemson (SC): Clemson Cooperative Extension, Land-Grant Press by Clemson Extension; Apr. LGP 1141. Available from: https://lgpress.clemson.edu/publication/how-to-stay-safe-around-chainsaws/
Hiesl P, Steele J. 2023. Managing pine trees with a thinning. Clemson (SC): Clemson Cooperative Extension, Land-Grant Press by Clemson Extension; Sep. LGP 1178. Available from: https://lgpress.clemson.edu/publication/managing-pine-trees-with-a-thinning/
Timilsina N, Hiesl P, Awasthi K. 2024. How to conduct a timber cruise. Clemson (SC): Clemson Cooperative Extension, Land-Grant Press by Clemson Extension; Jun. LGP 1193. Available from: https://lgpress.clemson.edu/publication/how-to-conduct-a-timber-cruise/
Sparks RJ, Guynn ST, Khanal P. 2021. Economic implications of wildlife considerations in timber management. Clemson (SC): Clemson Cooperative Extension, Land-Grant Press by Clemson Extension; Oct. LGP 1124. Available from: https://lgpress.clemson.edu/publication/economic-implications-of-wildlife-considerations-in-timber-management/
Khanal P, Straka T. 2020. Fundamentals of forest resource management planning. Clemson (SC): Clemson Cooperative Extension, Land-Grant Press by Clemson Extension; Apr. LGP 1047. Available from: http://lgpress.clemson.edu/publication/fundamentals-of-forest-resource-management-planning/

