Growers who are anticipating the collection of yield data this season should take the time to check yield monitor components to ensure accurate and valid data collection.
Yield monitors are the second most common precision agriculture technology used today.1 They are, for the most part, standard equipment on new grain combines. Proper calibration is key if management decisions, prescriptions, or profit maps are to be generated from yield data. Re-calibration of yield monitors should be conducted seasonally by crop for the greatest degree of accuracy. A non-calibrated yield monitor can provide relative data, but it is not reliable enough for making true production decisions such as profit maps. A few things to consider prior to calibration are to make sure the combine is working properly. If the combine is not working properly during calibration and the problem is fixed during harvest, the yield monitor may need to be recalibrated to account for issues found with the combine.
Varying the flow of grain into the machine will provide a range of mass flow rates, helping account for variation typically seen during harvest, and will provide greater confidence in yield data. Imposing different mass flow rates can be accomplished by harvesting loads of irrigated vs. non-irrigated crop, or by simply varying the travel speed between calibration loads; try to maintain a constant mass flow rate within a calibration load and only vary the mass flow rate between loads. When calibrating a yield monitor, the more loads collected, and larger load sizes will generally provide a more representative calibration. However, similar to mass flow rate, load size should be varied during the calibration procedure to capture multiple harvest scenarios into the calibration equation.
Prior to calibrating, read the operator’s manual for proper combine maintenance to ensure the machine is field-ready prior to any harvest or calibration. Next, read the manual for the yield monitor, check and properly set up the GPS offset and header swath width, and ensure the grain tank and the off-loading auger is empty. In addition, the following yield monitor components should be inspected and calibrated.
Preseason Checklist
Clean Grain Elevator Chain
Check the tension of the elevator chain and inspect for excessive wear to paddles, links, and sprockets. Mass flow rate is measured at the clean grain elevator; excessive wear or erratic grain delivery may result in instances of mass flow sensor response not being representative of the actual mass flow rate entering into the combine.
Moisture Sensor
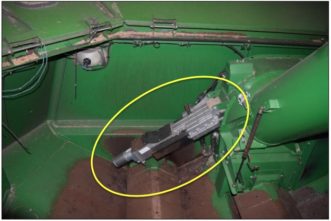
Check and clean the moisture sensor. If serviceable, remove any previous crop residues from the moisture sensor channel and plant resin from the sensor itself. The mass flow calibration provides a wet yield or field condition moisture, which can be corrected to a dry yield using the moisture sensor data. Proper moisture sensor operation is critical because an assessment of crop performance should generally be conducted on a dry yield basis.
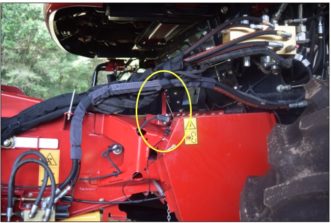
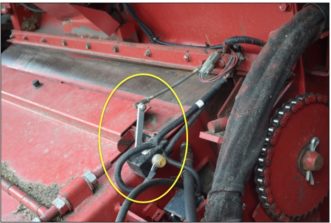
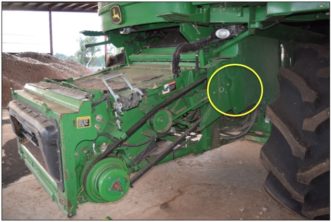
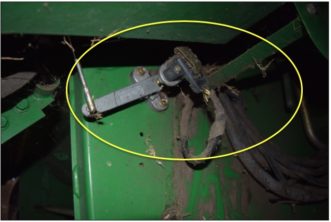
Header Height Sensor
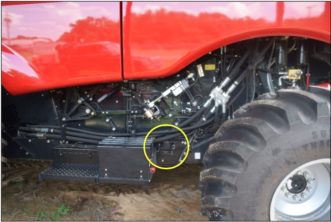
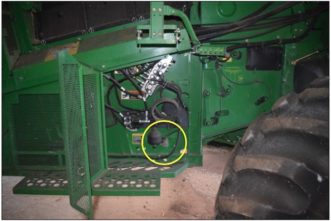
Check the sensor itself and ensure it is intact and that the wiring to the sensor has not been damaged. While it may not seem important, if this sensor is not accurately reading when the header is lowered into the crop, data collection may be incomplete; most grain yield monitors use header height position as a recording on/off trigger. This is a simple check, and the range of the sensor and data recording trip height should be checked and corrected if not set at the proper height.
Distance Calibration
Not all grain yield monitoring platforms allow for distance calibration; some platforms refer to this as a “Speed Sensor Calibration”. This calibration is to verify that the distance you are traveling is the distance that is being recorded. It is recommended to recalibrate to make sure acreage or field capacity recordings are accurate. Field capacity is calculated as speed times width, with speed being determined as distance per unit time. Yield monitors calculate crop yield as a function of mass flow rate and field capacity (lb/hr divided by ac/hr equals lb/ac). Thus, if your distance (e.g., field capacity) is off by 20%, then your yield estimate may also be off by 20% or more. Accurate distance measurement is just as important on a yield monitor as an accurate mass flow measurement.
Vibration Calibration
Some platforms may refer to a similar process as a “No-Flow” or “Yield Sensor Tare” calibration. Calibrate for the vibration of the harvester with the header engaged and at the normal harvest engine operating speed, but not while actually harvesting crop. This is done so that the vibration of the machine is not altering the data that is being recorded. Some manufacturer recommendations suggest that this calibration be done each time a different header is used on the harvester. Vibration calibration is important because it identifies a threshold sensor response caused by machine vibration alone. If more vibration occurs than that which was present during calibration, then the vibration may be erroneously counted as crop flow.
Elevator Shaft Speed Sensor (if equipped)
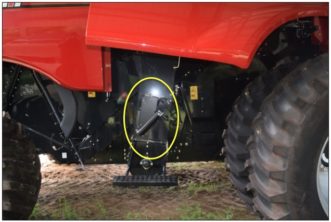
Verify that the elevator shaft speed sensor on the clean grain elevator is working properly and that it is not damaged. The elevator shaft speed sensor is often used as a recording trigger in addition to the header height sensor.
In-Field Calibration
Calibrating the Mass Flow Sensor
Depending on the yield monitor manufacturer, you likely need to flag loads as calibration loads or areas before they are harvested. Then harvest separate calibration loads with each load containing at least fifty bushels or 3,000 lb. Most manufacturers allow for only one calibration load, but we recommend at least three loads, each at a different mass flow rate for more accurate calibration. Limited research is available on identifying a specific number of loads required for calibration, but calibration accuracy will generally increase with each additional calibration load. Make sure that the grain tank and off-loading auger is completely empty after each load is harvested. Weigh each individual load with a calibrated weigh wagon or truck scale. After each of the calibration loads has been harvested and weighed, the actual weights can be entered in the yield monitor display. Most yield monitors allow you to enter all load weights at once, following the calibration. If you do not have access to a scale, contact your local Extension Agent, the Clemson Precision Agriculture office, or a local weighmaster. The SC Department of Agriculture maintains a list of licensed public weighmasters in South Carolina on their website. Be sure to call to make an appointment before visiting a weighmaster.
Calibrating the Moisture Sensor (if an option)
Some platforms do not provide moisture calibration but instead provide moisture “trim” capabilities. Some platforms also include a temperature calibration because the temperature is sometimes used in moisture calculations. So, if temperature calibration is an option, it should be completed prior to moisture calibration.
While harvesting the calibration loads for the mass flow sensor, or prior to calibrating the mass flow sensor as is recommended on some platforms, collect a representative sample from each load to determine grain moisture. Grain moisture can either be determined via a trustworthy handheld moisture tester or at most local grain elevators. Depending on the yield monitor, only one moisture reading may be required; however, we would suggest taking one or more readings from each of the harvested loads used for calibration and the average moisture from each load as a calibration. Specific procedures for moisture calibration vary by manufacturer and platform; consult your yield monitor operator’s manual or contact your local county Extension Agent or appropriate equipment dealer for details.
Conclusion
After completing these few steps, the yield monitor should be properly calibrated and ready for harvest. It is also important to note that as harvest continues throughout the remainder of the season, a separate calibration needs to be completed when harvest switches to another crop or harvest condition significantly changes.
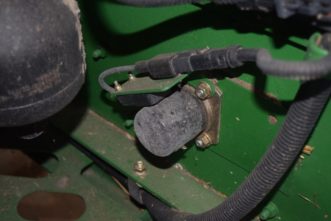
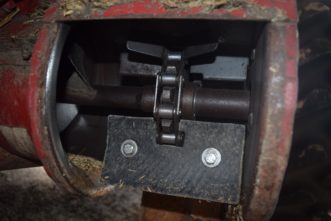
Examples of various yield monitor components are provided on the following pages (figures 1-11). These pictures are for example only and do not represent every make and model of harvester or yield monitor component. By way of providing these illustrations, Clemson University is not endorsing specific manufacturers of harvesters or yield monitor components. If you need assistance with yield monitor calibration, please contact your local county Extension Agent.
References Cited
Winstead AT, Norwood SH, Griffin TW, Runge M, Adrian AM, Fulton J, Kelton J. Adoption and use of precision agriculture technologies by practitioners. International Conference on Precision Agriculture; 2010; Denver (CO). Monticello (IL): International Society of Precision Agriculture. https://ispag.org/proceedings/?action=download&item=269.
References Consulted
John Deere. GREENSTAR yield monitor system and yield mapping system manual. Monine (IL): John Deere; 2002. http://manuals.deere.com/omview/OMH205952_19/OMH205952_19.htm.
Ag Leader. Yield monitor feature user guide. Aimes (IA): Harvest, Ag Leader; 2020. https://agleader.my.salesforce.com/sfc/p/#f4000000n8mw/a/f40000004qT7/iMMr2l9l.UwJVaBLAoRzuAuo8RjN5lp1qedjAHV6TSw.

